
| Distance | 10.64 mi* |
| Elevation Gain | 1706 ft |
| My Time | 5 hr 41 min |
| Difficulty | Moderate* |
| Closest Town | Estes Park |
| Food Nearby | Boss Burgers and Gyros |
Bear Lake Trailhead: Lakes Loop
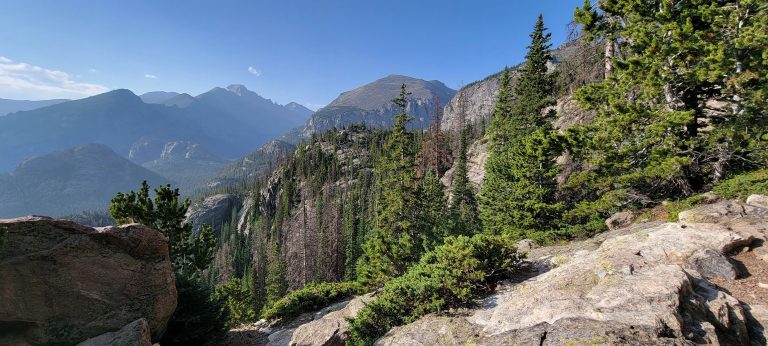
The Bear Lake Trailhead is one of the most popular places to explore around Rocky Mountain National Park. The trailhead has several options of trail and several alpine lakes that are accessible. I took what I like to call my Bear Lake Trailhead: Lakes Loop which visits several lakes without having to scramble or climb at all. Here is a look at the hike.
Bear Lake
Located just a short walk from the trailhead is Bear Lake. Bear Lake is very popular and relatively large lake. The path to the lake is easy to get to and should be good for all skill levels. This lake is great for a visit or a jumping off point to start a hike to the other lakes. Unfortunately I forgot to take a picture of the lake because I thought I would be coming back to it later.
Nymph Lake
Up next on my journey was the Nymph Lake Trail. The Nymph Lake Trail starts at the main trailhead area and runs four-tenths of a mile to the namesake lake. There is a little bit of elevation gain, maxing at around 10% grade. The trail is in really good shape and easy to follow and before you know it, you are at Nymph lake.
Nymph Lake is the smallest of the lakes that you will encounter. It feels more like pond that sits in a small clearing surrounded by trees. The most unique feature of the lake is the lily pads that float near the edges. There are a couple of spots near the waters edge where you can get close and see the lake.

After the lake you have a couple of options. First, you can head to the northeast and circle back to Bear Lake. You can also take a smaller trail to the south of Nymph that will take you to Dream Lake, although I didn’t see this trail while I was there. Finally, you can stay on the main trail which will take you to Dream Lake.
Dream Lake
The trail from Nymph to Dream Lake on the Bear Lake Trailhead: Lakes Loop is again very well defined and easy it to follow. Lake to lake is about a half mile and you will have a similar elevation gain as the trip to Nymph. This section of trail might be a touch steeper and touches a 13% grade for a very short time. There is also a small stream that leaves Dream lake and connects with Chaos Creek that you will have to cross but there is a bit of a bridge.
Dream Lake is a longer, narrower lake that stretches about a third of a mile tip to tip. There are some really nice places on the rocks on the east side of the lake to take in the views. This is the side that you will approach the lake on.
There is also a trail junction as you approach Dream Lake. The signs will tell you that you can continue west to Emerald Lake or turn south to head to Lake Haiyaha.

I continued west to head to Emerald lake. The walk on the trail takes you right next to the banks of Dream lake for that third of a mile and is really pretty and I suggest doing it if you have the chance.
Emerald Lake
When you leave the side of Dream Lake you will be heading towards Emerald Lake. From the edge of the water of the Dream will start the nightmare. (See what I did there?) The nightmare is the steepest part of the hike to this point. A quick tenth of a mile that gets up to a 20% grade. There is nothing technical about the walk but it does get a bit steep so make sure you take your time.
When you clear the short incline the trail will flatten out on your way to Emerald Lake. Emerald lake is a basin lake that is completely surrounded by tall cliffs. The side of the lake that you will come upon has some rock formations that surround it allowing for a bit of traversing to get some higher vantage points.
There are also some roots and rocks lower down near the waters edge that you can get down to. That’s the way I went and the roots actually made for a very nice seat right near the water.

This is the end of this section of trail so once you have spent some time at Emerald Lake it is time to retrace your steps and head back to Dream Lake.
Lake Haiyaha
Back at Dream Lake you will come to that trail junction again. If you have seen enough, you can head back the way you came to the parking area. I went towards Lake Haiyaha. I do have to warn you that this trail has some of the steepest sections of the day so keep in mind how much energy you want to spend.
From the trail junction the path to Haiyaha almost immediately climbs a steep wooded hill. The hill runs a third of a mile and is consistently in the high teens for grade and even touches 20%. When you get to the top of the hill the trail flattens out and you get some amazing views looking back to the east side of the park. You will also have a nice crossing of Chaos Creek over bridge.
It is just about 1.1 miles from the junction at Dream to the banks of Haiyaha. The last two tenths of a mile before the lake also get a little more challenging. There are some large boulders for you to walk over and some of them are a touch loose so make sure to watch your step.
The lake side is also just a series of large boulders that you can walk on to get a little closer to the water. There are plenty of good views from the top as well if you don’t feel comfortable. I was able to make it down close to the water and have to say that at this point Haiyaha was my favorite lake. Although, Mills lake will surpass it.

Mills Lake
After leaving Hiayaha Lake you will need to retrace your steps a bit. You can either head back to Dream Lake and return that way or continue my modified Bear Lake Trailhead: Lakes Loop. To continue the loop you will come to a Haiyaha Cutoff trail two tenths from Lake Haiyaha. This trail will take you to the Glacier Gorge trail that will connect to Mills Lake.
The cutoff trail is one and two-tenths of a mile and when you come this way it is all downhill! If you try to take this trail the other way it is pretty much straight up hill the whole time so I prefer this way for the loop. When you do connect to the Glacier Gorge trail you will want to head south for a little over a half mile to Mills Lake
Mills Lake became my favorite lake of the loop as soon as I saw it. The long lake seems to stretch forever before disappearing in the mountains in the distance. As you approach the North end of the lake you will have plenty of options for large areas near the waters edge to enjoy the views and get some snacks. There were also several people fishing from the edge.
The Glacier Gorge trail follows along the bank of the lake for six-tenths of a mile, occasionally making its way up into the woods but never too far from the water. The elevation gain is negligible while following near the water and it is nice to get some extra perspective of the lake as most people stay on the north end.

As you continue down to the end of Mills lake you won’t have to wait long to see your next lake!
Jewel Lake
Jewel Lake is just a tenth of a mile from the Mills lake and they are actually connected by a small stream. Jewel Lake is a smaller lake that is surrounded by some thicker woods and further down the path. It is a little calmer as less people come this far. The trade off is it also doesn’t have as many nice rocky areas to enjoy on the edges but a few people did make it down to fish the banks.

This would be the last lake that I would suggest that do not require any climbing or scrambling and a wise person would turn around and head back at this point. I am not a wise person.
Trail to Black Lake
If you continue down the trail towards Black Lake you will notice a big difference in the trail. What was a very well defined trail up until this point becomes more primitive. There is a big uptick in elevation and the trail gets a bit harder to follow.
There is a very nice stream that forms a bunch of small waterfalls on this portion of the trail. I had run into a conservation officer in the park who told me that trip to Black lake was flat and easy but that was not the case. Luckily a mile down the path a ran into a photographer named Keith who told me that I would actually need to scramble to get Black Lake and that was a deal breaker for me. I turned around about a mile from the lake and am still ok with that decision.
Finishing up
Depending on when you decided to stop you will have a couple of options on how to return. If you stopped early I have already mentioned how to return. If you made it to Mills or Jewel Lake then you can take the Haiyaha Cutoff but it is pretty steep so I wouldn’t recommend it.
From Mills lake you can follow Glacier Gorge back. There is a trail called the Fire Trail that I actually didn’t see but according to the map you can take that back to the Bear Lake parking area.
I stayed on Glacier Gorge and made my way to Alberta Falls before making my way down to the Glacier Gorge parking area. From there you can take the road or wait for the bus to make it back to the parking lot. So plenty of options but this is also where my phone battery died so no pictures of the return trip.
Overall a great day spent at Rocky Mountain National Park and a ton of Alpine lakes visited without having to scramble or climb!
Video
I have put a couple of videos together for you. This first one is a narrative look at the hike:
Next up is the time-lapsed version of the hike itself which I like to call my hikers edit. If you enjoy the videos make sure to like and subscribe to my YouTube channel. It is free and you will get all the latest updates when I post new videos.
Distance and Elevation
If you don’t have the AllTrails app you might want to check it out, I really love mine. It records your progress and is a great way to search for hikes that are nearby and gives you difficulty measurements. According to AllTrails today’s hike was recorded as 10.64 miles. My phone died so it was closer to 12 miles. The hike and had a total elevation gain of about 1,706 feet including undulations. That put the high point at around 10,258 feet. I was also moving for a total of 5 hours and 41 minutes.
I am a Pro member of Alltrails and love it. If you are interested in the platform, please consider using my affiliate link for AllTrails. It gives me a small commission with no extra cost to you.
Effort
While overall the hike was a bit challenging, it is really broken down into several smaller hikes to the different lakes. If something is too challenging it might be possible to skip a lake and still have an enjoyable time. The hardest part was heading out towards Black Lake at the end of the hike. I didn’t end up making it all the way to the lake as the elevation gain was a bit much at the end of the day.
Terrain
There are several different terrain types at Rocky Mountain National Park but more often than not the trail will be pretty rocky. There is some small bouldering around some of the lakes as well to get the best views. While some of the trail is simple dirt path I would still suggest a good pair of hiking boots or shoes that provide good grip and good ankle support.
Access
Rocky Mountain National Park has gone to a ticketing system. There are several time slots during the season available for each day that allow access to certain parts of the park. Check out Recreation.gov for tickets and more information.
This particular hike was started from the Bear Lake Trailhead which is located at the end of Bear Lake Road in the park. There is a big parking lot for probably over 100 cars but it fills up very quick. There are pit toilets available at the trailhead.
Wrapping up Bear Lake Lakes Loop
An absolutely great hike at Rocky Mountain National Park. This hike started with me taking the wrong trail and ended up at me taking a six hour hike where I saw 5 lakes and had an amazing time. Just a reminder that the park does have a summer reservation system that you can find more about at recreation.gov.
If you have never been to Rocky Mountain National Park this might be a good trail to do all or part of to really see some of the most popular lakes without having to do any technical climbing or scrambling. A great day and some great sights!
I have added this hike and all of my hikes to my interactive map page that you can find here. If you have a suggestion or comment you can email me at fatmanlittletrails@gmail.com or follow me on any of the below social media platforms. Happy Hiking!


RMNP never fails to impress. You wrote a great trail description.
Thanks! Such a wonderful place!
Pingback: Mills Lake from Bear Lake Trailhead (Winter) - Fat Man Little Trail
Pingback: Boss Burgers and Gyros - Estes Park - Fat Man Little Trail